Posts Tagged ‘android’

How To | Droid VNC Server

If you’re anything me, you’ve Rooted your Android phone and you’re looking for all of the coolest apps available to you. For a long time I’ve been looking for a great app that would allow me to remotely access my HTC DROID Incredible using VNC. Why would I want to remotely access my phone you ask? I’m lazy. No, just kidding. 😉

Benefits of remote access:

  • Access to your phone if it’s not immediately with you.
  • Ability to create a screencast.
  • Faster screen shots.
  • Ability to help & support other Android users.
  • Access your phone if you’re at work or school and don’t want to look like you’re on your phone. 😉
  • etc…

Well, now I have discovered Droid VNC Server. Created by onaips at the XDA forums.

Droid VNC Server is a great little app. It’s not without it’s bugs, but the bugs that I have do not even come close to outweighing it’s positives. While I have not officially seen any confirmations of Droid VNC Server working on the Incredible, it does work quite nicely for me. In regards to other Android phones, your mileage may vary, but you can check out onaips blog to see a small listing of confirmed functional devices.

Ok, enough talking. How do I use this thing?

Step 1: Preparing your computer

You will have to be sure that you have a VNC Viewer installed on your computer first. Here’s a quick list of programs that can be used:

  • Linux – Remote Desktop Viewer (However, I use the command line). Remote Desktop Viewer is pre-installed in Ubuntu.
  • Mac – Chicken of the VNC.
  • Windows – RealVNC.

Step 2: Preparing your Android device

  • Scan the QR Code at the top of the page to be directed to the Droid VNC Server page in the Android Market.
  • Open Droid VNC Server and tap Start Server.
  • Suggestion – Connect to a wireless signal that your computer is also using or use USB. (I have not yet tested USB & Verizon does not support VNC through 3G)
  • Feel free to modify any of the options in Menu > Settings. (I’d recommend a password)

Step 3: Connect to your Device

  • Open your VNC Viewer of choice and type in the IP:Port that you see listed on the Droid VNC Server home screen.
  • Type in your password if needed.
  • You should now see your Android Device!

Some helpful things to know:

Some possible incorrect keybindings: (I have a feeling this is an Android thing…)

  • = sends +
  • ! sends ~
  • ~ sends 0
  • < sends *
  • > sends #
  • / sends :

These are important to know: 😉

  • home = home
  • right-click = home, also
  • pg up = menu
  • pg down = call
  • pg down long press = redial most recent
  • esc = back
  • del = back, also
  • end = phone sleep
  • type = from the home screen random typing will initiate google search

Here are some instructions for using VNC through USB:

I have heard that USB will provide a faster VNC connection. With adb installed and the device plugged in via USB:
adb forward tcp:5901 tcp:5901
adb forward tcp:5801 tcp:5801

Using your preferred VNC Viewer, connect to:

localhost:5901

YouTube How To (Not created by me)


How To | Root HTC DROID Incredible Using Ubuntu

Superuser Access

UPDATE: If you have installed the newest OTA update (Nov. 2010) this tutorial will no longer work. It seems that the latest OTA update included a patch that closed the hole used for rooting the Incredible. Read more here.


UPDATE: This just in from the unrEVOked twitter account.

unrevoked unrevoked dev team
Incredible people stuck w/ new OTA: we have a fix in the pipe for you; expect a release in a day or two. EVO folks: temporary fix on XDA.


I searched on many different websites that teach people how to Root their Incredible, but I was never able to really locate a tutorial that focused solely on Rooting in an Ubuntu (or Linux at all) environment. Many of them would mention Linux, but would be very general. I would see statements like: “The steps will work relatively the same in Linux.” Well, that was not good enough for me and with any luck this tutorial will come in handy for all of you Ubuntu/Incredible users. 🙂

This guide is an adaptation of Bob Denny’s tutorial that can be found here. For this tutorial, I will be using unrEVOked3 since it’s easily the most simple Rooting process.

Step 1: Preparation – Ubuntu

Before you will be able to do anything, you will need to ensure that you have the Android SDK installed on your system. If you have already done thins, skip to Step 2: Preparing The Phone.

  • Android SDK | Android Developers
  • Extract tar.gz file; you can rename extracted folder to whatever you like (e.g., “android”)
  • Move “android” folder to the root of your drive using this command in your terminal:

sudo mv /path/to/android /

  • Run “Android SDK and AVD Manager” using this command: (I added mine to the Applications menu for simplicity)

/android/tools/android update sdk

  • Now ensure that the ADB Server is running as root:

sudo ./adb start-server

  • Ensure that your Incredible is recognized by ADB

adb devices

Note: that you do not need to download any drivers for Linux. The phone is already supported.

Step 2: Preparing The Phone

  • Verify that you have an SD Card installed with at least 2Gb free space. If the SD is smaller than 4Gb, make sure it is FAT32 formatted. Look at it on gParted to be sure.
  • Boot the phone normally.
  • Enable USB Debugging (Settings > Applications > Development).
  • Enable Unknown Sources (Settings > Applications at the top).
  • Enable USB “Ask Me” mode (Settings > Connect to PC).
  • Plug in the USB cable and choose Charge Only on the phone.

Step 3: Rooting The Phone

sudo ~/Desktop/reflash

(if this does not work and unrEVOked sits there not doing anything, open Nautilus with root and double-click the file)

If you did everything right, and if your phone is a stock 2.2 Incredible, Reflash will come up and start the rooting process.

Be patient! The process involves several (4) reboots and some long periods of apparent inactivity. Let it go. Wait for at least 5 minutes before deciding it has become stuck.

How to know it worked:
Once the Reflash process completes (5 or so minutes), unplug the USB and reboot the phone. It will look normal. Open the App tray and look for the Superuser app. If you open Superuser it will be blank, that’s normal. For final confirmation, reboot the phone into HBOOT (volume down + power) and see if it says S-OFF at the top. If so, you’re rooted!

Step 4: Backing up the phone
Now that you’re rooted and in HBOOT, it’s time to do a complete backup of the phone (a.k.a. Nandroid backup). DO THIS NOW!

  • In HBOOT, using the volume buttons move to RECOVERY and press the Power button. The phone will appear to reboot but it will end up in the ClockWorkMod recovery screen. From now on use the trackball on the Incredible (click to select).
  • Move to Backup and Recovery, then select. This will show the Backup and Recovery menu.
  • Move to Backup
  • Select to start the backup.
  • When the backup completes (several minutes), press the power button to return to the main ClockWorkMod menu
    Select Reboot System, go.

When the phone boots to its normal mode, you’re done! Now you can enjoy the benefits of root. 🙂

Day of Ubuntu Wall Paper for Android

Day Of Ubuntu (originally called Dawn of Ubuntu) is a dynamic wallpaper which changes depending on the time of day:  dawn, noon, dusk and midnight. To see what it looks like on my desktop look at my June Screenshot.

I originally did a post about Day of Ubuntu for your Linux desktop. However an Android user that goes by the name of KllrSoft ported the highly popular Dynamic Wallpaper to Android phones. It’s easily my favorite Live Wallpaper now. Typically a Live Wallpaper will just destroy your battery life, however Day of Ubuntu will not. Day of Ubuntu is synced with the clock on your phone and simply changes the wallpaper based on the time of the day. So the wallpaper will sit dormant as long as it’s not time to change itself.

AppBrain users can click here to install.

Market Download


How To | Thunderbird/Android Calendar Sync

Have you been wondering the best way to sync your Android calendar with your Thunderbird calendar (via Lightning). Well, you’ve come to the right place!
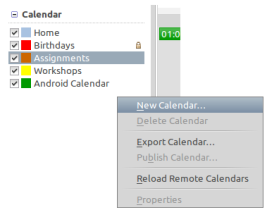
I personally know that I’ve been looking for this tool. Here’s how I like to sync my Android calendar with my Thunderbird…

Step 1: Download Provider for Google Calendar

Step 2: Open Thunderbird and go to the add-ons menu. (Tools > Add-ons)

Step 3: Click Install and then locate the newly downloaded add-on, after Thunderbird has restarted, go to your calendar

Step 4: On the left side, where your calendars are listed, right-click and select “New Calendar,” click “Network Calendar” and then “Google Calendar.” Stop here and proceed to Firefox

Step 5: Open your calendar that is associated with your Android phone and in the upper right corner click Settings > Calendar Settings

Step 6: Click the “Calendars” tab and then click on the email address associated with your Android phone

Step 7: Near the bottom you will see “Private Address,” click on XML and copy the URL shown on the screen and go back to Thunderbird where you stopped on Step 6

Step 8: Paste the URL of your “Private Calendar” here and click Next

Your Android calendar should now appear in your Thunderbird calendar. They will sync in both directions making it nice and easy to add/remove/edit your events.

Remote Notifier for Android

If you’re anything like me, you have a tendency to leave your phone on silent while working, or maybe you leave your phone on vibrate while you’re working on the computer in the other room. In these situations, you might receive a message. Maybe it’s an SMS, an Email, a phone call or even knowing that the battery is running low.

Well, no longer will you have to worry about missing those all too critical messages. With Remote Notifier for Android, you always be notified of those incoming messages as long as you’re near your computer. It will use your computer’s built in notification system (NotifyOSD in Ubuntu) to display a toaster pop telling you that your phone has just received a message or call. You can install this on one or more of your computer’s as well so that no matter which computer you’re using you will receive the message. The great thing about this program is that it’s platform agnostic. Meaning it will run on Linux, Mac, & Windows.

It works utilizing two different methods of communication: Bluetooth sync to the computer or Wi-Fi. In my case, I used Wi-Fi since my home computer’s do not have Bluetooth.

How to get Remote Notifier for Android running:

  • Download and install the Remote Notifier for Android from the Android Market.
  • Go here to get the desktop half of the notification system.
    • To make things slightly easier for my Ubuntu friends: 32bit | 64bit
  • Install from the appropriate installer for your computer.
  • Run the desktop version.
  • Open the Android App and configure it according to your needs.

At this point, as long as both halves of the Notifier are running you should then begin receiving notifications immediately.

Android Market Link

AndroidU1

As you all may have recently been reading, one of my newest toys is my HTC DROID Incredible. Well, as with any other Linux users, I want to find ways to customize my phone to fit my specifications. That means downloading tons of applications, tweaking the themes, and finding as many games as possible. 😉

Another thing that I love about having an Android device is that I can really stay connected. By connected, I don’t mean HTC’s idea of “connected” (Social), I mean connected to my things. I have several programs that sync with my Ubuntu box and all of them are used for different reasons. One for SSH, one for VNC, one for streaming music, etc…

One of the newest programs that I’ve discovered will allow me to sync to Ubuntu in a different way. More specifically, it connects to my Ubuntu One account. That’s right, Ubuntu One. A user on the Ubuntu Forums, mkarnicki, seems to have seen fit to take it upon himself (Approved by Ubuntu) to create an Android application that would sync an Android phone with a user’s U1 account.

Enter AndroidU1. 🙂

AndroidU1 is nowhere near being a completed application, but the creator has taken some huge strides in a very short amount of time. It has great potential to be a really awesome application, and integrate really well with users accounts. I also have it on good authority and in the next day or two, there will be a huge update.

It’s worked well thus far, but has crashed once. Although, that’s to be expected of a program still in Beta a pre-Alpha release, it’s a developer version. For those of you who want more information about the program or want to try it out, here is more information:

AndroidU1 Blog Page: http://android-u1.blogspot.com/
Wiki Page: http://goo.gl/42LU
Launchpad Page: https://launchpad.net/androidu1
Launchpad Team Page (+mailing list): https://launchpad.net/~androidu1-users

Scan & Download

How To | Google Voice Voicemail

One of the things that I was really looking forward to when getting my Android powered phone, was visual voicemail. I saw a few of my friends using it and I was, quite honestly, jealous. I knew it was going to be something that I had to utilize.

I’m the first person to admit that I, pretty much, hate voicemail. It’s not really the voicemail itself that I hate either, and it’s not that people are calling me. Nothing like that. What I hate about it is going through the process of calling my voicemail, typing in my pin number, and then listening to each message individually and deciding what I want to do with it, then acting upon my decision. I understand that this is not a “chore” to most of the world, but it annoys me to go through this process.

Most, if not all, carriers provide a visual voicemail service built in to their Android handsets. Some carriers even provide this service for free. Verizon is not one of those carriers..

Verizon thinks that I should have to pay an additional $3.00 a month for this service on top of all the money I am already paying them. I know some people would say, “well it’s just $3.00 a month, pay it.” No. Not going to happen. I know full well that there are free services available to me that will take care of this.

When you type in “Visual Voicemail” in the Android Market’s search box, a few services will appear. However, the way they work is to forward caller’s to their service and the voicemail gets stored on their servers for you to access. I don’t want this. I don’t know these companies and I just don’t trust them.

Along came Google Voice.

I’ve had a Google Voice account for a while now, but have never really used it. Now that I have the Incredible and have a real use for it, I am definately taking advantage of GV. I realize that the voicemails are now being stored on Google servers, but Google is a company that I feel I can trust. Not to mention, I have a phone with a Google made operating system.. 100% integration folks. 🙂

Advantages over traditional voicemail:

  1. Voicemail listed so that I can look at any of them without wading through audio computer system
  2. Voicemail’s are sent to me through email
  3. Can access my voicemail from any computer using my Google Voice account
  4. Voicemails can be transcribed to text so that I can read them if I am somewhere I cannot use my phone’s audio
  5. Ability to stop, pause, rewind & fast forward messages
  6. Delete without listening
  7. etc..

Enough talking. Here’s how to setup Google Voice in your Android device:

Step 1: Get a Google Voice account

Step 2: Activate Google Voicemail

  • From the GV account page, click on “Settings” in the upper right corner of the page. Click on the “Phones” tab.
  • You should see your mobile number listed with a link that says “Activate Google voicemail on this phone.” Click on this link and Google will give you steps to dial a specialized phone number from your handset.
  • Dial this number and from now on, when people call you and the phone goes unanswered the call will get forwarded to Google Voice.

Step 3: Record your greeting

  • Click on the “Voicemail & Text” tab.
  • Click “Record New” and GV will call your phone to prompt you with options to record your new greeting message.
  • Record and hangup.
  • Go back to your GV account and the “Voicemail & Text” tab. From here you can listen to your greeting through your computer and apply it or re-record.
  • Under “Voicemail Notifications,” I unchecked Send a text (SMS) message.

Step 4: Do Not Disturb

  • Go back to the “Phones” tab and click “Edit” under your mobile number.
  • Click “Show advanced settings” and under “Forwarding Options” select “Go straight to voicemail.”
  • Now click on the “Calls” tab. Check the box that states “Enable ‘Do Not Disturb.'”

Step 5: Setting up the phone

  • Open the Android Market and search for “Google Voice
  • Download and install the app, then open it up.
  • It will immediately start going through the setup process. Towards the end of the process it will ask you to dial the specialized phone number again from Step 2. No need to do this again.
  • During the process your phone will be reprogrammed to utilize GV as it’s primary voice mail serivce instead of your carriers.
  • In the GV App, press Menu -> Settings -> Sync and Notifications
  • Enable Synchronize Inbox
  • Enable Background data (this will make sure that you receive your voicemails right away)
  • Enable Inbox notifications (this will make sure you receive a notification in your status bar)
  • You will now have access to all of your messsages using this app. It’s quite nice.

Step 6: Last two forwarding options (This will vary depending on your carrier)

  • For some reason, GV did not prompt me to set this up, but I figured it out through trial and error.
  • Back on Step 2 you had to dial a specialized phone number, well, there are two more.
  • You need to setup forwarding for cal that are Ignored and calls that never made it to your phone due to lack of coverage.
  • On your HTC Droid Incredible: (These are for Verizon only)

    Dial *90xxxxxxxxxx (xxxxxxxxxx is your GV phone number) and press Call
    Dial *92xxxxxxxxxx (xxxxxxxxxx is your GV phone number) and press Call

NOTE: Please do a google search for how to setup these options for your carrier.

How To | Change Your HTC Incredible Boot Animation

For those of you that own an HTC Incredible, or possibly any other Android powered phone, you may or may not like your boot animation. I, for one, do not like the Incredible’s stock boot animation. It’s pretty lame to be complately honest. So I decided it was time to make a change.

There are plenty of tutorials for doing this on a Windows based box, but that was not cutting it for me. Here is a How To for Android owners for changing your boot animation using your Ubuntu box. These directions may work for other distro’s as well, however, I have not tested, so YMMV.

Note: DO NOT plug the phone to your computer yet.

Step 1: Download

  • Your choice of: bootanimation.zip and android_audio.mp3 (.mp3 file must be named “android_audio.mp3”)

Step 2: Edit desc.txt file

  • Unzip bootanimation.zip and edit desc.txt file
  • Use editors of your choice (gedit, kate)
  • Your desc.txt would be something like:
325 430 15
p 1 0 android
p 1 0 eye
p 0 0 loading
  • Make sure you save it as a UNIX file, otherwise it won’t work
  • Zip the folder up again (without compression) – bootanimation.zip

Note: I only extracted the desc.txt file and not the entire contents of bootanimation.zip. After editing desc.txt, I just re-added that back into the original bootanimation.zip file. This worked for me. YMMV.
Step 3: Install Android SDK

  • Android SDK | Android Developers
  • Extract .zip file; you could rename extracted folder to whatever you like (e.g., “android”)
  • Move “android” folder to the root of your drive using this command in your terminal:

sudo mv /path/to/android /

  • Run “Android SDK and AVD Manager” using this command: (I added mine to the Applications menu)

/android/tools/android update sdk

Note: that you do not need to download any drivers for Linux. The phone is already supported.
Step 4: Copy/Move

  • Copy/Move your bootanimation.zip and android_audio.mp3 files into the “tools” folder of the SDK (e.g., /android/tools)

Step 5: On Your Incredible

  • Turn USB Debugging ON (Settings->Applications->Development)
  • NOW, you can connect your phone to the PC
  • You should get an exclamation mark icon on your Incredible notification bar
  • Be sure to set/mount your USB connection to “Disk Drive”; do not use “Charge only”

Step 6: Test Your Setup

  • Open terminal
  • Change directory to the “tools” folder in your SDK (e.g., /android/tools)
  • Run the following command:

sudo ./adb start-server (you need to be in root for this to work)

  • You should see something like this:
* daemon not running. starting it now *
* daemon started successfully *
List of devices attached
HT048HJ00425 device

Step 7: Push Animation/Audio

  • Run the following commands:

adb push bootanimation.zip /data/local
adb push android_audio.mp3 /data/local
(if you want sound during bootup)

  • You should have seen that a certain amount of data was added to the phone after each command

Step 8: Reboot Your Incredible

  • You might want to go through the proper procedure for unmounting/disconnecting your phone from your computer first
  • You might want to turn off USB Debugging
  • Enjoy your new animated boot screen

Sources: Incredible Boot Animation, Android SDK | Android Developers, Installing HTC Incredible Android SDK Drivers

Note: this worked for me. This may or may not work for you. If, by following this, you brick your Incredible, I am not liable for anything.

My New Toy!

I Finally did it! Got me a new phone. For the last two years I have suffered with my garbage Motorola Q9c. I’ve had to put up with, at least, the following:

  • Randomly restarts for no rhyme or reason
  • Randomly shuts off without a full Shutdown, and will not turn on without pulling out the battery
  • Constant roaming = No data
  • 5-6 hours of battery life while on standby
  • etc…

Those were just the “tip of the iceberg” issues that I was having with my phone. But no more!!

I have finally invested in the HTC Droid Incredible. I must say, based on my first impressions… the phone is amazing. It has given me everything that I have wanted out of a phone, and then some. Not to mention it syncs perfectly with my gmail account. Having my contacts list constantly backed up makes me feel so much better. As you all know, Windows Mobile’s Active Sync is not friendly with a Linux user. So having this funtionality is so great to me.

The only thing that I can consider a negative is the battery life. However, in fairness to HTC, I did not break in the battery properly. Anyone who knows me, knows that I am slightly impulsive and impatient at times. Well… once the phone arrived, all I could think about was playing with it. So this caused me to improperly charge the battery out of the box for the recommended 8 hours.

To make things even better, my wife has a Droid also! We got her the Motorola Droid and, based on what I’ve seen, she loves her’s as well. She loves having the slide up physical keyboard.

For more information, please check out my Android page. It has a current list of my installed apps and more importantly, the apps that I’m looking for.